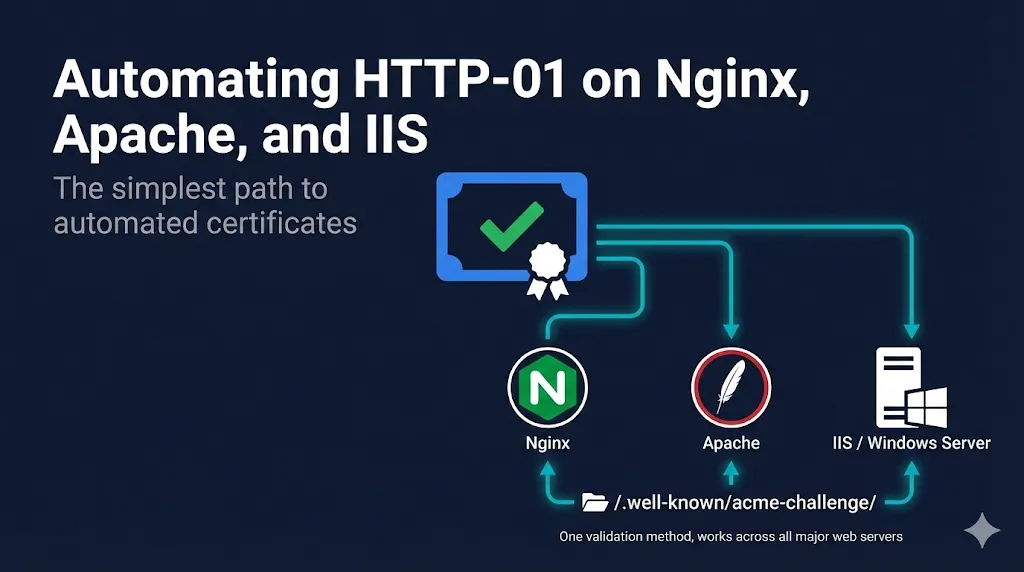
Watch: HTTP-01 Automation Explained
HTTP-01 is the most widely used ACME challenge type for good reason: no DNS credentials, no API tokens, no complex delegation. If you can serve a file on port 80, you can automate certificate issuance.
Who this is for: SysAdmins, DevOps engineers, and web server administrators running Nginx, Apache, or IIS who want zero-touch certificate automation. This guide covers the configurations that actually work in production.
How HTTP-01 Validation Works
When you request a certificate using HTTP-01:
ACME client requests certificate
You ask for a cert for example.com.
CA provides token
Let's Encrypt returns a random token.
Client creates challenge file
Placed at http://example.com/.well-known/acme-challenge/{token}.
CA verifies file
Let's Encrypt fetches the URL from multiple vantage points.
Certificate issued
Validation passes, you get your cert.
The entire exchange happens over HTTP on port 80. Your ACME client handles everything automatically—you just need to make sure the challenge path is accessible.
Prerequisites
Before automating, verify:
- Port 80 is open and reachable from the internet
- Domain DNS points to your server
- Web server can serve static files from .well-known/acme-challenge/
- No redirects blocking the challenge path (more on this below)
Nginx
1Certbot with Nginx Plugin (Recommended)
Certbot's Nginx plugin handles everything—challenge files, certificate installation, and config updates.
# Install
sudo apt install certbot python3-certbot-nginx

# Issue and install certificate
sudo certbot --nginx -d example.com -d www.example.com

# Test renewal
sudo certbot renew --dry-run
Certbot automatically creates the challenge response, modifies your Nginx config to add SSL, and sets up auto-renewal via systemd timer. The --dry-run validates your DNS, firewall, and challenge path without hitting rate limits.
2Webroot Mode
If you don't want Certbot modifying your Nginx config:
# Issue certificate only (no auto-install)
sudo certbot certonly --webroot -w /var/www/html -d example.com
Note: The webroot path varies by distribution. Common defaults: /var/www/html (Debian/Ubuntu), /usr/share/nginx/html (RHEL/CentOS). Confirm your actual document root with nginx -T | grep root before running.
Then manually configure Nginx:
server {
    listen 443 ssl;
    server_name example.com;

    ssl_certificate /etc/letsencrypt/live/example.com/fullchain.pem;
    ssl_certificate_key /etc/letsencrypt/live/example.com/privkey.pem;

    # Your site config...
}
Production tip: Enable OCSP stapling for faster TLS handshakes. See the Let's Encrypt Best Practices guide.
3Standalone Mode
For servers not running a web server (or during initial setup):
# Certbot spins up its own temporary server on port 80
sudo certbot certonly --standalone -d example.com
Note: This requires stopping Nginx temporarily if it's already bound to port 80.
Challenge Path Configuration
If using webroot mode or having issues, ensure Nginx serves the challenge directory:
server {
    listen 80;
    server_name example.com;

    # ACME challenge location - must not redirect
    location ^~ /.well-known/acme-challenge/ {
        root /var/www/html;
        default_type "text/plain";
        try_files $uri =404;
    }

    # Redirect everything else to HTTPS
    location / {
        return 301 https://$host$request_uri;
    }
}
The ^~ modifier ensures this location takes priority over other rules.
Apache
1Certbot with Apache Plugin (Recommended)
# Install
sudo apt install certbot python3-certbot-apache

# Issue and install certificate
sudo certbot --apache -d example.com -d www.example.com

# Test renewal
sudo certbot renew --dry-run
Certbot automatically updates your Apache virtual host configuration. The --dry-run validates your DNS, firewall, and challenge path without hitting rate limits.
2Webroot Mode
sudo certbot certonly --webroot -w /var/www/html -d example.comManual Apache SSL configuration:
<VirtualHost *:443>
    ServerName example.com

    SSLEngine on
    SSLCertificateFile /etc/letsencrypt/live/example.com/fullchain.pem
    SSLCertificateKeyFile /etc/letsencrypt/live/example.com/privkey.pem

    # Your site config...
</VirtualHost>
Challenge Path Configuration
Ensure the challenge directory is accessible and not redirected:
<VirtualHost *:80>
    ServerName example.com
    DocumentRoot /var/www/html

    # Allow ACME challenges
    <Directory "/var/www/html/.well-known/acme-challenge">
        Options None
        AllowOverride None
        Require all granted
    </Directory>

    # Redirect everything else to HTTPS (except challenges)
    RewriteEngine On
    RewriteCond %{REQUEST_URI} !^/.well-known/acme-challenge/
    RewriteRule ^(.*)$ https://%{HTTP_HOST}$1 [R=301,L]
</VirtualHost>
Note: Virtual host-level redirects (as shown above) are preferred for performance. Use .htaccess only when you cannot modify the main Apache configuration.
If using .htaccess for redirects, add this exception:
RewriteEngine On
RewriteCond %{REQUEST_URI} !^/.well-known/acme-challenge/
RewriteCond %{HTTPS} off
RewriteRule ^(.*)$ https://%{HTTP_HOST}%{REQUEST_URI} [L,R=301]
IIS (Windows)
1win-acme (Recommended)
win-acme (formerly letsencrypt-win-simple) is the standard ACME client for Windows/IIS.
# Download and extract win-acme
# Run as Administrator

.\wacs.exe
Interactive mode walks you through:
- Select IIS site
- Choose domains from bindings
- Validate via HTTP-01
- Install certificate to IIS
- Configure automatic renewal
Scheduled task created automatically — win-acme sets up renewal in Windows Task Scheduler.
win-acme Command Line
For scripted deployments:
# Simple certificate for single site
wacs.exe --target iis --siteid 1 --installation iis

# Specific bindings
wacs.exe --target iis --host example.com,www.example.com --installation iis2Posh-ACME (PowerShell Native)
For PowerShell-centric environments:
# Install module
Install-Module -Name Posh-ACME

# Set Let's Encrypt as CA
Set-PAServer LE_PROD

# Get certificate
New-PACertificate -Domain example.com -AcceptTOS

# Certificate files in: $env:LOCALAPPDATA\Posh-ACME\
After issuance, you must bind the certificate to your IIS site. Example using the certificate thumbprint:
# Bind certificate to IIS site (run after certificate issuance)
$cert = Get-PACertificate

# Bind to IIS using netsh
netsh http add sslcert hostnameport="example.com:443" certhash=$cert.Thumbprint appid='{00000000-0000-0000-0000-000000000000}'

# Or use IIS PowerShell module
Import-Module WebAdministration
New-WebBinding -Name "Default Web Site" -Protocol https -Port 443
$binding = Get-WebBinding -Name "Default Web Site" -Protocol https
$binding.AddSslCertificate($cert.Thumbprint, "My")
IIS Challenge Path Configuration
IIS may block extensionless files in the challenge directory. Fix with web.config:
Create /site-root/.well-known/acme-challenge/web.config:
<?xml version="1.0" encoding="UTF-8"?>
<configuration>
    <system.webServer>
        <staticContent>
            <mimeMap fileExtension="." mimeType="text/plain" />
        </staticContent>
        <handlers>
            <clear />
            <add name="StaticFile" path="*" verb="*"
                 modules="StaticFileModule"
                 resourceType="Either"
                 requireAccess="Read" />
        </handlers>
    </system.webServer>
</configuration>
This ensures IIS serves the challenge tokens correctly.
Common Gotchas and Fixes
Port 80 Blocked
Symptom: Connection timeout during validation
Causes:
- Firewall blocking inbound port 80
- ISP blocking port 80 (rare, mostly residential)
- Cloud security group misconfigured
Fix: Open port 80, or use DNS-01 validation instead.
You need port 80 open even if your site is HTTPS-only. The ACME challenge always happens over HTTP. Note: wildcard certificates (*.example.com) always require DNS-01—HTTP-01 cannot validate wildcards.
HTTPS Redirect Breaking Validation
Symptom: "Invalid response" or redirect loop errors
Causes:
- Blanket HTTP→HTTPS redirect includes the challenge path
Fix: Exclude /.well-known/acme-challenge/ from redirects (see configs above).
Load Balancer in Front
Symptom: Validation fails intermittently
Causes:
- Challenge file only exists on one backend server; CA hits a different one (common with NGINX, AWS ALB, Cloudflare, F5)
Fix: Use shared storage (NFS, EFS), sticky sessions, DNS-01, or centralized issuance.
Wrong Document Root
Symptom: 404 on challenge URL
Causes:
- ACME client creating files in wrong directory
Fix: Verify webroot path and specify correct directory with -w flag.
CDN Caching Challenge Response
Symptom: CA sees stale or missing challenge
Causes:
- CDN caching the 404 or old token
Fix: Exclude /.well-known/ from CDN caching, bypass CDN for validation, or use DNS-01.
Multiple Servers, Same Domain
Issue certificates on one server and distribute to others. For larger estates, use centralized issuance on a single ACME client host and distribute certificates via configuration management tools (Ansible, Puppet, SCCM):
┌─────────────────┐     ┌──────────────────┐
│  ACME Client    │────▶│  Shared Storage  │
│  (one server)   │     │  (NFS/EFS/S3)    │
└─────────────────┘     └────────┬─────────┘
                                 │
                    ┌────────────┼────────────┐
                    ▼            ▼            ▼
               ┌────────┐  ┌────────┐  ┌────────┐
               │ Web 1  │  │ Web 2  │  │ Web 3  │
               └────────┘  └────────┘  └────────┘
Renewal Automation
Linux (systemd)
Certbot installs a systemd timer by default:
# Check timer status
sudo systemctl status certbot.timer

# View timer schedule
sudo systemctl list-timers | grep certbot
Runs twice daily, only renews if expiring within 30 days.
Linux (cron)
If not using systemd:
# Add to root crontab
0 3 * * * certbot renew --quiet --deploy-hook "systemctl reload nginx"
The --deploy-hook only runs when a certificate is actually renewed, not on every check. This prevents unnecessary service reloads.
Windows
win-acme creates a scheduled task automatically. For Posh-ACME or manual setups:
# Create scheduled task
$action = New-ScheduledTaskAction -Execute "PowerShell.exe" `
    -Argument "-File C:\Scripts\renew-certs.ps1"
$trigger = New-ScheduledTaskTrigger -Daily -At 3am
Register-ScheduledTask -TaskName "ACME Renewal" -Action $action -Trigger $trigger
Running daily is safe—ACME clients only renew when the certificate is within 30 days of expiry, so most daily runs exit immediately with no action.
Post-Renewal Hooks
Reload web server after renewal to pick up new certificate:
# Nginx
certbot renew --post-hook "systemctl reload nginx"

# Apache
certbot renew --post-hook "systemctl reload apache2"
Verification and Testing
Test Challenge Path Accessibility
# Create test file
echo "test" | sudo tee /var/www/html/.well-known/acme-challenge/test

# Verify externally
curl -I http://example.com/.well-known/acme-challenge/test

# Should return 200 OK with text/plain content
Browser tip: Also test by opening the challenge URL in your browser. You should see the raw file content with a 200 OK response—no redirects, no HTML wrapper. If you see a redirect or error page, fix your web server config before attempting issuance.
Use Staging Environment First
Let's Encrypt has rate limits. Test with staging:
certbot --staging -d example.comStaging certs aren't trusted but validate your setup without hitting limits.
Check Certificate Installation
# Verify cert is installed
echo | openssl s_client -connect example.com:443 2>/dev/null | openssl x509 -noout -dates

# Check full chain
echo | openssl s_client -connect example.com:443 -servername example.com 2>/dev/null | openssl x509 -noout -issuer -subject
Quick Reference
| Server | Recommended Tool | Install Command |
|---|---|---|
| Nginx | Certbot + nginx plugin | apt install certbot python3-certbot-nginx |
| Apache | Certbot + apache plugin | apt install certbot python3-certbot-apache |
| IIS | win-acme | Download from win-acme.com |
| Use case | Approach |
|---|---|
| Single server, standard setup | Certbot with server plugin |
| Don't want config changes | Webroot mode |
| No web server running yet | Standalone mode |
| Load balanced / multi-server | Shared storage or DNS-01 |
| Port 80 blocked | DNS-01 |
| Wildcard certificate needed | DNS-01 (HTTP-01 can't do wildcards) |
| Internal / air-gapped systems | Internal CA, manual issuance, or DNS-01 via delegated zone |
Related Resources
Which DCV Method to Automate?
Decision framework for HTTP-01, DNS-01, and TLS-ALPN-01
Automating DNS-01 with DNS APIs
When HTTP-01 isn't an option
Automating TLS-ALPN-01
Port 443-only validation with Caddy, Traefik, and acme.sh
ACME Protocol Demo
Interactive demo of the ACME challenge-response flow
Let's Encrypt Best Practices
Production-ready configuration for automated certificates